The Raspberry Pi ecosystem thrives on its ability to handle complex tasks with affordable hardware, and the Picamera2 library has become a cornerstone for capturing images and videos. Developers often turn to OpenCV, a powerful open-source computer vision library, to process and analyze visual data. But can Picamera2, the modern Python interface for Raspberry Pi cameras, seamlessly integrate with OpenCV? This question sparks curiosity among hobbyists and professionals building projects like surveillance systems, robotics, or AI-powered image processing.
Understanding the compatibility between Picamera2 and OpenCV unlocks a world of possibilities for Raspberry Pi enthusiasts. Picamera2, designed to work with the latest Raspberry Pi camera modules, offers advanced features like real-time image capture and flexible configuration. Meanwhile, OpenCV provides tools for image manipulation, object detection, and machine learning. Combining these two can supercharge projects, but the integration process requires careful consideration of technical nuances, from setup to performance optimization.
This article explores how Picamera2 and OpenCV work together, addressing setup steps, potential challenges, and best practices. Whether you’re a beginner setting up your first Raspberry Pi camera or an experienced developer optimizing a computer vision pipeline, this guide provides actionable insights. Dive in to learn how to harness these tools for your next project, with practical tips to ensure smooth compatibility and high performance.
Understanding Picamera2 and OpenCV
What Is Picamera2?
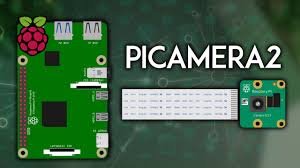
Picamera2 is a Python library tailored for Raspberry Pi camera modules, succeeding the original Picamera library. It supports advanced features like real-time preview, high-resolution image capture, and video recording. Built to leverage the libcamera framework, it offers greater flexibility for modern Raspberry Pi systems. Developers use Picamera2 for projects requiring precise control over camera settings. Its compatibility with Python makes it ideal for rapid prototyping.
What Is OpenCV?
OpenCV, or Open Source Computer Vision Library, is a robust toolkit for image and video processing. It supports tasks like object detection, facial recognition, and real-time video analysis. Available in Python, C++, and other languages, OpenCV is widely used in robotics and AI applications. Its extensive documentation and community support make it accessible. For Raspberry Pi users, OpenCV handles complex visual data processing efficiently.
Why Combine Picamera2 with OpenCV?
Combining Picamera2 with OpenCV enables powerful computer vision applications on Raspberry Pi. Picamera2 captures high-quality visual data, while OpenCV processes it for tasks like motion tracking or image filtering. This synergy supports projects like autonomous vehicles or smart cameras. Understanding their integration helps developers leverage both tools effectively. The combination is particularly valuable for resource-constrained environments like Raspberry Pi.
Setting Up Picamera2 and OpenCV on Raspberry Pi
To integrate Picamera2 with OpenCV, proper setup is critical. Below are key steps to ensure compatibility:
- Install Raspberry Pi OS: Use the latest version, preferably 64-bit, for optimal performance.
- Update the System: Run sudo apt update && sudo apt upgrade to keep packages current.
- Install Picamera2: Use pip install picamera2 to add the library.
- Install OpenCV: Install via pip install opencv-python or build from source for customization.
- Verify Camera Module: Ensure the Raspberry Pi camera is enabled via raspi-config.
Preparing the Raspberry Pi Environment
A clean Raspberry Pi setup ensures smooth installation of Picamera2 and OpenCV. Start with a fresh Raspberry Pi OS installation to avoid conflicts. Update the system to access the latest dependencies for both libraries. Enable the camera module in raspi-config under “Interfacing Options.” Install Python 3 and pip to manage packages. A stable power supply prevents crashes during resource-intensive tasks.
Installing Picamera2
Picamera2 relies on the libcamera framework, included in recent Raspberry Pi OS releases. Install it using pip install picamera2, ensuring Python 3.7 or higher is present. Verify the installation by running a simple script to capture an image. Check camera connectivity with libcamera-still -o test.jpg. If errors occur, confirm the camera module is properly connected and enabled.
Installing OpenCV
OpenCV installation can be straightforward with pip install opencv-python for the pre-built package. For better performance, consider building OpenCV from source to enable hardware acceleration on Raspberry Pi. This requires installing dependencies like libatlas-base-dev and libopencv-dev. Test the installation by importing cv2 in Python. Ensure sufficient disk space, as OpenCV can be resource-heavy during setup.
Capturing Images with Picamera2 for OpenCV
Basic Image Capture with Picamera2
Picamera2 simplifies image capture with its intuitive Python interface. Initialize the camera with Picamera2() and configure settings like resolution. Use the capture_array() method to grab a frame as a NumPy array, which is compatible with OpenCV. Save images or pass them directly to OpenCV for processing. This method ensures efficient data transfer between the two libraries.
Converting Picamera2 Output to OpenCV Format
Picamera2 outputs images in NumPy arrays, which OpenCV can process directly. By default, Picamera2 captures in RGB format, aligning with OpenCV’s expected input. Use capture_array(“main”) to get the array and pass it to OpenCV functions like cv2.imshow(). If color issues arise, convert formats using cv2.cvtColor(). This step ensures seamless integration without data loss.
Real-Time Image Processing
Real-time processing combines Picamera2’s capture capabilities with OpenCV’s analysis tools. Capture frames in a loop using capture_array() and apply OpenCV functions like edge detection or color filtering. Optimize performance by reducing resolution or frame rate on resource-limited Raspberry Pi models. Test with simple scripts to display processed frames. This approach suits applications like live object detection or video analysis.
Handling Video Streams with Picamera2 and OpenCV
To process video streams, consider these integration techniques:
- Initialize Video Capture: Use Picamera2’s start() method to begin streaming.
- Frame Extraction: Capture frames with capture_array() in a loop.
- OpenCV Processing: Apply OpenCV functions to each frame for real-time analysis.
- Display Output: Use cv2.imshow() to visualize processed frames.
- Optimize Performance: Lower resolution or frame rate to reduce CPU load.
Setting Up a Video Stream
Picamera2 supports continuous video capture through its streaming capabilities. Initialize the camera and start streaming with start(). Configure resolution and frame rate to balance quality and performance. Use capture_array() to grab frames in a loop. Ensure the Raspberry Pi has sufficient memory to handle continuous streaming. This setup is ideal for applications like surveillance or motion tracking.
Processing Video Frames with OpenCV
OpenCV excels at processing video frames for tasks like object detection or motion tracking. Capture each frame with Picamera2 and pass it to OpenCV as a NumPy array. Apply functions like cv2.Canny() for edge detection or cv2.detectMultiScale() for face detection. Use a loop to process frames in real time. Test with a simple script to ensure smooth frame handling.
Managing Performance for Video
Video processing is resource-intensive on Raspberry Pi. Reduce frame resolution or frame rate to improve performance. Use OpenCV’s hardware-accelerated functions if built from source. Monitor CPU and memory usage with tools like htop. Implement frame-skipping techniques to process only key frames. These optimizations ensure smooth video streaming and processing for real-time applications.
Overcoming Common Integration Challenges
To address common issues, use these troubleshooting tips:
- Camera Not Detected: Verify camera connection and enable it in raspi-config.
- Format Mismatches: Convert Picamera2’s RGB output to OpenCV’s BGR if needed.
- Performance Lag: Lower resolution or use hardware acceleration.
- Library Conflicts: Ensure compatible versions of Picamera2 and OpenCV.
- Memory Errors: Increase swap space or use a 64-bit OS.
Resolving Camera Connectivity Issues
If Picamera2 fails to detect the camera, check physical connections and ribbon cables. Run vcgencmd get_camera to confirm detection. Ensure the camera is enabled in raspi-config. Update the Raspberry Pi OS and libcamera to the latest versions. Test with libcamera-still to isolate issues before integrating with OpenCV.
Handling Format and Compatibility Problems
Picamera2 outputs RGB frames, while OpenCV often expects BGR. Use cv2.cvtColor(frame, cv2.COLOR_RGB2BGR) to convert formats if colors appear incorrect. Ensure both libraries use compatible Python versions (e.g., Python 3.7+). Check for dependency conflicts by installing in a virtual environment. Test with small scripts to verify data flow between Picamera2 and OpenCV.
Optimizing for Low-Resource Environments
Raspberry Pi’s limited resources can cause lag in Picamera2-OpenCV applications. Reduce image resolution or frame rate in Picamera2 settings. Use OpenCV’s optimized functions or build it with hardware acceleration (e.g., NEON or VFP). Increase swap space for memory-intensive tasks. Profile performance with tools like time or htop. These steps ensure efficient processing on low-power hardware.
Advanced Applications and Best Practices
Building a Real-Time Object Detection System
Combine Picamera2 and OpenCV to create an object detection system. Use Picamera2 to capture live video and OpenCV’s pre-trained models (e.g., Haar cascades or DNN) for detection. Optimize frame rates for real-time performance. Test with simple objects like faces or shapes before scaling to complex tasks. This approach suits applications like security cameras or robotics.
Implementing Machine Learning with OpenCV
OpenCV supports machine learning models for tasks like image classification. Capture images with Picamera2 and preprocess them using OpenCV’s tools. Feed processed data into models like TensorFlow or PyTorch, integrated via OpenCV’s DNN module. Ensure sufficient storage for model files. This setup enables AI-driven projects like smart agriculture or autonomous navigation.
Best Practices for Scalable Projects
For robust Picamera2-OpenCV projects, use modular code to separate capture and processing logic. Implement error handling to manage camera or memory issues. Optimize performance by profiling bottlenecks with tools like cProfile. Use virtual environments to isolate dependencies. Document code and configurations for reproducibility, ensuring scalability for complex applications like IoT or computer vision systems.
Conclusion
Integrating Picamera2 with OpenCV empowers Raspberry Pi developers to build sophisticated computer vision projects. From setting up the environment to processing real-time video, this guide covers essential steps and solutions to common challenges. By leveraging Picamera2’s capture capabilities and OpenCV’s processing power, creators can develop applications like surveillance systems or AI-driven robotics. With careful optimization and best practices, the combination unlocks endless possibilities for innovative, resource-efficient projects.