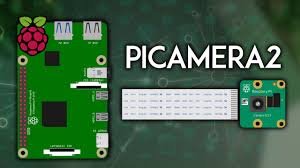
The Raspberry Pi platform has revolutionized DIY electronics, empowering creators to build everything from home automation systems to advanced robotics. Central to many of these projects is the Raspberry Pi camera module, and with Picamera2, video previewing has reached new heights of flexibility and power. This Python library, tailored for Raspberry Pi’s camera modules, simplifies video capture and display, making it a go-to tool for hobbyists and professionals alike.
Picamera2, built on the modern libcamera stack, replaces the original Picamera library, offering seamless integration with Raspberry Pi OS Bullseye and later. Its robust features support real-time video previews, ideal for applications like security cameras, live streaming, or computer vision experiments. With an intuitive API, Picamera2 reduces the complexity of camera operations, enabling users to focus on creativity rather than technical hurdles.
This comprehensive guide explores how to leverage Picamera2 for video previewing, providing detailed steps, code examples, and optimization strategies. From hardware setup to advanced configurations, every facet of creating smooth, high-quality video previews is covered. Whether a beginner or an experienced developer, this article equips you with the knowledge to unlock Picamera2’s full potential for your Raspberry Pi projects.
Setting Up Your Raspberry Pi and Camera Module
Preparing the Raspberry Pi
A properly configured Raspberry Pi ensures a smooth Picamera2 experience. Begin by updating the system with sudo apt update && sudo apt upgrade to fetch the latest packages. Access raspi-config via the terminal, navigate to the “Interfaces” menu, and enable the camera interface. Reboot the system to apply changes. Verify the camera module’s physical connection to the CSI port, ensuring cables are secure and correctly oriented to avoid detection issues.
Installing Picamera2
Picamera2 depends on the libcamera framework, included in Raspberry Pi OS Bullseye or newer. Install it by running pip install picamera2 in the terminal. Confirm the installation with python3 -c “import picamera2; print(picamera2.__version__)”. If errors arise, update Python 3 and pip using sudo apt install python3-pip. For older OS versions, upgrade to Bullseye or Bookworm to resolve compatibility issues and ensure access to libcamera dependencies.
Testing the Camera Connection
Before coding, test the camera hardware with libcamera-hello, which displays a basic preview. A successful feed confirms the camera’s functionality. If no preview appears, recheck the CSI cable connections and ensure the camera is enabled in raspi-config. For persistent issues, consult the Raspberry Pi documentation or forums. This step ensures the camera is ready for Picamera2, preventing delays in script development.
Writing a Basic Video Preview Script
- Importing Picamera2: Begin your Python script with from picamera2 import Picamera2 to access the library’s functionality. This module provides classes for camera control and preview management. Use Python 3, as Picamera2 is incompatible with Python 2. Save the script as preview.py for clarity. Ensure the script runs in an environment with graphical output, such as a monitor or VNC session.
- Initializing the Camera: Create a Picamera2 instance with picam2 = Picamera2(). This object interfaces with the camera hardware. Call picam2.start() to initialize the camera and start capturing data, automatically launching a preview window with default settings. For custom configurations, adjust parameters before starting the camera. This step establishes the foundation for displaying a live video feed.
- Displaying the Preview: Use picam2.start_preview() to render the video feed. Picamera2 supports multiple preview backends, such as Qt, QtGL, or DRM, depending on your setup. The default backend typically works for most systems. Execute the script with python3 preview.py to view the live feed. Stop the preview with picam2.stop() to release resources, ensuring clean script termination.
Configuring Video Preview Parameters
Adjusting Resolution
Resolution affects both video quality and system performance. Configure it with picam2.configure(picam2.create_preview_configuration(main={“size”: (width, height)})). Common resolutions like 640×480 or 1280×720 balance quality and resource usage. Higher resolutions, such as 1920×1080, demand more processing power, so test on your Raspberry Pi model. Apply changes by restarting the camera with picam2.start(). Experiment to find the optimal resolution for your project’s needs.
Setting Frame Rate
Frame rate controls video smoothness and system load. Set it in the configuration with {“framerate”: 30} for 30 FPS. Lower rates, like 15 FPS, conserve resources, ideal for battery-powered or low-spec devices. Higher rates suit fast-moving scenes but may cause lag on older models like the Raspberry Pi 3. Adjust and test frame rates to achieve smooth previews without overloading the system.
Modifying Preview Window Size
Customize the preview window’s appearance with picam2.start_preview(True, x=100, y=100, width=800, height=600). The x and y parameters set the window’s position, while width and height define its size. This is crucial for projects requiring specific display layouts, such as multi-window dashboards. Ensure the values align with your monitor’s resolution to avoid display errors or clipping.
Handling Common Preview Challenges
- No Preview Display: If the preview fails to appear, verify the camera connection and Picamera2 installation. Run libcamera-hello to test the camera. Ensure picam2.start() is called before previewing. For headless setups, configure a VNC server or use a remote-compatible backend like Qt over SSH. Check system logs with journalctl for clues on display initialization failures.
- Lag or Low Frame Rate: Lag often stems from high resolution or frame rate settings. Reduce to 640×480 or 15 FPS to improve performance. Use htop to monitor CPU usage and identify bottlenecks. For older Raspberry Pi models, disable background processes or lower graphical effects. Updating the OS and Picamera2 can also resolve performance issues caused by outdated libraries.
- Preview Window Crashes: Crashes may result from incompatible preview backends or memory shortages. Try switching to picam2.start_preview(“qtgl”) or picam2.start_preview(“drm”). Update Picamera2 and system firmware with sudo apt full-upgrade. Check memory availability with free -m. If crashes persist, consult the Picamera2 GitHub issues page or Raspberry Pi forums for backend-specific solutions.
Advanced Video Preview Techniques
- Overlaying Text or Graphics: Enhance previews with overlays using OpenCV. Capture frames with picam2.capture_array(), then use OpenCV functions like cv2.putText() to add text, such as timestamps or labels. Display the modified frame in the preview window with picam2.set_overlay(). This is ideal for real-time data visualization in projects like weather stations or security monitors requiring dynamic information.
- Streaming Video Output: Stream video over a network for remote access. Use picam2.start_recording(encoder, output) with an H.264 encoder and a network socket as the output. Libraries like flask or gstreamer can simplify streaming setups. This enables applications like live webcam feeds viewable on browsers or mobile devices, expanding project accessibility and functionality.
- Multi-Camera Previews: Manage multiple cameras by creating separate Picamera2 instances for each module. Configure unique preview windows with distinct x and y coordinates to avoid overlap. Use low resolutions to reduce resource strain, as multiple streams are demanding. Test thoroughly on your Raspberry Pi model, especially with older hardware, to ensure stable performance across all feeds.
Optimizing Performance for Video Preview
Reducing CPU Load
High CPU usage can disrupt video previews. Lower resolution to 640×480 or frame rate to 15 FPS to ease the load. Use hardware-accelerated backends like DRM or QtGL for efficient rendering. Monitor performance with htop or top to identify resource-heavy processes. For long-running projects, add heatsinks or fans to prevent thermal throttling, especially on Raspberry Pi 4 or 5 models.
Managing Memory Usage
Memory constraints can cause preview instability or crashes. Close unnecessary applications before running scripts. Configure Picamera2 with minimal buffer counts, e.g., buffer_count=2, to reduce memory allocation. Check available memory with free -m and free up resources by stopping unused services. For memory-intensive projects, consider upgrading to a Raspberry Pi model with higher RAM, like the 8GB Raspberry Pi 4.
Ensuring Stable Power Supply
A reliable power supply prevents camera failures or preview interruptions. Use a 5V, 3A adapter for Raspberry Pi 4 or later. Avoid underpowered USB hubs for camera connections, as they may cause voltage drops. For portable projects, use high-capacity batteries with consistent voltage output. Power issues often appear as random preview drops or camera initialization errors, so monitor power stability during testing.
Conclusion
Mastering video preview with Picamera2 transforms Raspberry Pi camera projects into powerful, dynamic applications. From configuring hardware and writing scripts to optimizing performance and exploring advanced techniques, this guide provides a roadmap for success. Experiment with resolutions, overlays, and streaming to elevate your projects. With Picamera2’s versatility, creators can build innovative solutions, from live feeds to multi-camera setups, unlocking endless possibilities with confidence and creativity.