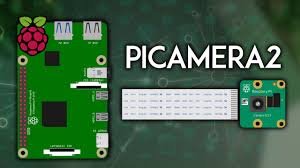
The Raspberry Pi, a versatile single-board computer, has become a favorite among hobbyists, educators, and developers for building innovative projects. One of its most exciting applications is in camera-based projects, thanks to its compatibility with camera modules. Picamera2, a powerful Python library, simplifies capturing images and videos with the Raspberry Pi Camera Module, offering advanced features over its predecessor, Picamera. This guide walks you through installing Picamera2 on your Raspberry Pi, ensuring you can start creating stunning visual projects.
Setting up Picamera2 can seem daunting, especially for beginners unfamiliar with the Raspberry Pi ecosystem. However, with clear instructions, the process becomes straightforward, allowing you to leverage the library’s capabilities for tasks like time-lapse photography, live streaming, or machine vision projects. This article provides a step-by-step approach, covering everything from preparing your Raspberry Pi to troubleshooting common issues. Whether you’re a seasoned developer or a curious tinkerer, these steps ensure a smooth installation process.
Before diving in, it’s essential to understand the prerequisites and ensure your hardware and software are ready. Picamera2 is designed for Raspberry Pi’s operating system, Raspberry Pi OS, and works seamlessly with modern camera modules. By following this guide, you’ll gain insights into configuring your system, installing dependencies, and verifying your setup. Let’s explore how to install Picamera2 and unlock the full potential of your Raspberry Pi camera projects.
Preparing Your Raspberry Pi for Picamera2 Installation
Updating Raspberry Pi OS
Keeping your Raspberry Pi OS up to date is crucial for compatibility with Picamera2. Start by connecting your Raspberry Pi to the internet and opening a terminal. Run sudo apt update to fetch the latest package lists, followed by sudo apt full-upgrade to install updates. This ensures your system has the latest security patches and software versions, reducing the risk of compatibility issues during installation. Reboot your Pi afterward with sudo reboot to apply changes.
Checking Hardware Compatibility
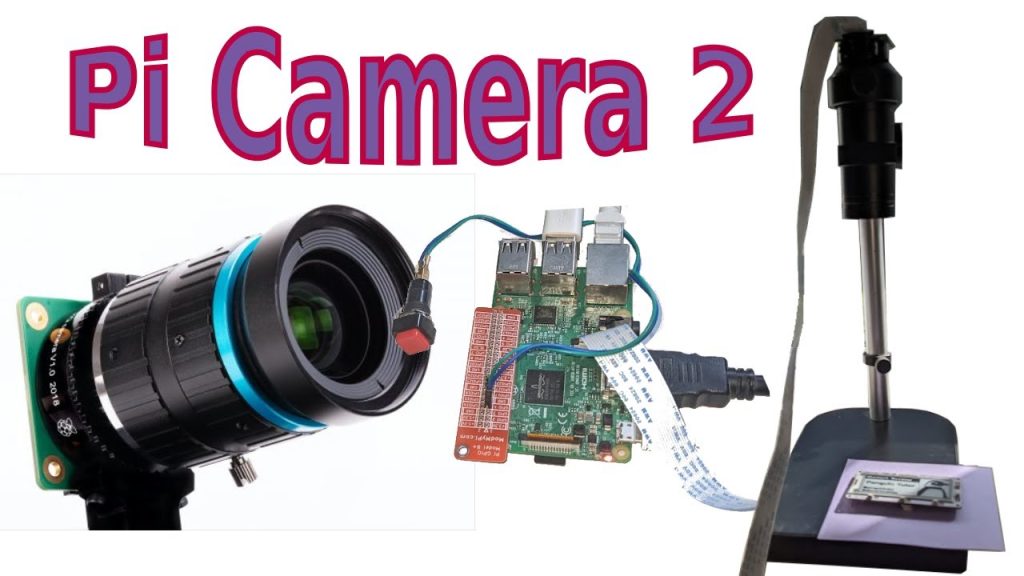
Picamera2 supports various Raspberry Pi models, including the Raspberry Pi 3, 4, and 5, but requires a compatible camera module, such as the Raspberry Pi Camera Module v2 or v3. Verify that your camera is properly connected to the CSI camera port on your Pi. Check the ribbon cable for secure connections and ensure the camera is enabled in the Raspberry Pi configuration. Use raspi-config to confirm camera settings under the “Interfaces” menu.
Setting Up a Stable Power Supply
A stable power supply is vital for reliable camera operation. The Raspberry Pi Camera Module and Picamera2 can be power-intensive, especially during video recording. Use a 5V, 3A power adapter for Raspberry Pi 4 or 5, and avoid powering through a USB hub. Insufficient power may cause the camera to malfunction or the Pi to reboot unexpectedly. Check for low-voltage warnings in the terminal with vcgencmd get_throttled.
Installing Required Dependencies for Picamera2
Installing Python and pip
Picamera2 is a Python library, so you need Python and pip installed. Raspberry Pi OS typically includes Python 3 by default, but verify this by running python3 –version. If missing, install it with sudo apt install python3. Next, ensure pip is installed by running python3 -m ensurepip –upgrade. This allows you to install Python packages, including Picamera2. Confirm pip’s version with pip3 –version to ensure it’s up to date.
Adding libcamera and Supporting Libraries
Picamera2 relies on libcamera, a core component for camera functionality in modern Raspberry Pi OS. Install libcamera with:
- sudo apt install libcamera-dev: Installs the development libraries for libcamera.
- sudo apt install python3-libcamera: Adds the Python bindings for libcamera.
- sudo apt install python3-pyqt5: Installs PyQt5 for GUI-based Picamera2 applications. These libraries ensure Picamera2 can interface with your camera hardware. Check for successful installation by running libcamera-hello, which tests basic camera functionality.
Ensuring OpenGL Support
Picamera2 uses OpenGL for rendering previews, requiring specific drivers. On Raspberry Pi OS, enable the OpenGL driver by running sudo raspi-config, navigating to “Advanced Options,” and selecting “GL Driver.” Choose the “Full KMS” option for compatibility with Picamera2’s preview features. Reboot your Pi after enabling the driver. This step ensures smooth rendering of camera previews, especially for real-time applications like live streaming or GUI-based projects.
Downloading and Installing Picamera2
Cloning the Picamera2 Repository
The official Picamera2 library is available on GitHub. Open a terminal and clone the repository using git clone https://github.com/raspberrypi/picamera2.git. This downloads the latest version of Picamera2 to your Raspberry Pi. Navigate to the downloaded directory with cd picamera2. If git is not installed, add it with sudo apt install git. Cloning the repository gives you access to example scripts and documentation.
Running the Installation Script
Inside the picamera2 directory, locate the installation script. Run pip3 install . to install Picamera2 and its dependencies. This command compiles and installs the library, making it available system-wide. Ensure you have an active internet connection, as pip may download additional packages. The process may take a few minutes, depending on your Raspberry Pi model and internet speed. Check for errors in the terminal output.
Verifying the Installation
After installation, verify Picamera2 is correctly installed by running a simple test. Create a Python script with nano test.
Run the script with python3 test.py. If successful, it displays your camera’s sensor modes, confirming Picamera2 is working. If errors occur, double-check your camera connection and libcamera installation.
Configuring Picamera2 for Optimal Performance
Setting Camera Parameters
Picamera2 allows customization of camera settings like resolution and frame rate. Use the configure() method to set parameters. For example, to set a 1920×1080 resolution, include in your script:
- picam2.configure(picam2.create_still_configuration(main={“size”: (1920, 1080)}))
- Adjust frame rates with controls.FrameRate.
- Enable autofocus (if supported) with controls.AfMode. Test different configurations to balance quality and performance. Higher resolutions may reduce frame rates on older Raspberry Pi models.
Managing Preview Windows
Picamera2 supports preview windows for real-time camera output. Use start_preview() to display a preview. For GUI applications, integrate with Qt via start_preview(Preview.QTGL). Ensure your OpenGL drivers are enabled, as discussed earlier. Adjust preview window size to optimize performance:
- Smaller previews (e.g., 800×600) reduce CPU load.
- Use stop_preview() when not needed to free resources. Experiment with preview settings to suit your project’s needs.
Handling Storage and File Outputs
Picamera2 saves images and videos to your Raspberry Pi’s storage. Specify output paths in your script, such as picam2.capture_file(“image.jpg”) for photos or picam2.start_recording(“video.h264”, “video.mp4”) for videos. Ensure sufficient storage on your SD card, as high-resolution videos consume significant space. Use external drives for large projects. Always stop recording with stop_recording() to avoid file corruption.
Testing and Using Picamera2 in Projects
Capturing Images
To capture an image, create a Python script with:
- from picamera2 import Picamera2
- picam2 = Picamera2()
- picam2.configure(picam2.create_still_configuration())
- picam2.start()
- picam2.capture_file(“test.jpg”) Run the script to take a photo. Check the output file in your directory. Adjust settings like exposure or white balance for better results. This basic script is ideal for testing and serves as a foundation for advanced projects.
Recording Videos
Picamera2 supports video recording with customizable codecs. Use start_recording() to begin capturing video. For example:
- picam2.start_recording(“video.h264”, “video.mp4”)
- Set resolution and frame rate in the configuration.
- Stop recording with stop_recording(). Test recordings to ensure smooth playback. For longer videos, monitor your Raspberry Pi’s temperature to prevent overheating, especially on older models.
Building a Simple Time-Lapse Project
Time-lapse photography is a popular Picamera2 application. Create a script to capture images at intervals:
- Use a loop with time.sleep() to set intervals.
- Save images with unique filenames, e.g., image_{}.jpg.format(i).
- Combine images into a video using ffmpeg. Test the script with short intervals to verify timing. This project is perfect for capturing slow-changing scenes like sunsets or plant growth.
Troubleshooting Common Picamera2 Installation Issues
Resolving Camera Not Detected Errors
If Picamera2 fails to detect your camera, check the physical connection. Ensure the ribbon cable is securely attached to the CSI port and the camera module. Run libcamera-hello to test camera detection. If it fails, re-enable the camera in raspi-config. Update libcamera with sudo apt install libcamera-dev python3-libcamera. Verify your camera module is compatible with your Raspberry Pi model.
Fixing Dependency Conflicts
Dependency conflicts may arise during Picamera2 installation. If pip fails, clear the pip cache with pip3 cache purge. Reinstall dependencies individually, starting with libcamera-dev and python3-libcamera. Check for conflicting Python versions by running python3 –version and pip3 –version. Use pip3 install –force-reinstall picamera2 to overwrite problematic installations. Review terminal errors for specific package conflicts and address them accordingly.
Addressing Performance Issues
If Picamera2 runs slowly, optimize your setup. Reduce resolution or frame rate in your configuration to lower CPU load. Ensure OpenGL is enabled for efficient previews. Check for background processes consuming resources with htop (install with sudo apt install htop). Overheating may also cause slowdowns; use a heatsink or fan for Raspberry Pi 4 or 5. Test incrementally to identify performance bottlenecks.
Conclusion
Installing Picamera2 on your Raspberry Pi opens a world of possibilities for camera-based projects, from simple photography to advanced machine vision applications. By following the steps outlined updating your system, installing dependencies, configuring settings, and testing functionality you can ensure a seamless setup. Troubleshooting tips help address common hurdles, empowering you to create with confidence. Dive into your next project, leveraging Picamera2’s versatility to capture stunning visuals and bring your ideas to life.