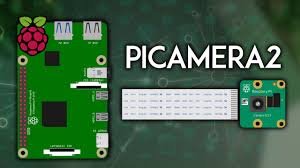
The Picamera2 library is a powerful tool for Raspberry Pi enthusiasts, enabling seamless interaction with camera modules to capture high-quality still images and videos. Designed as an upgrade to the original Picamera, it offers enhanced features, better performance, and compatibility with modern Raspberry Pi systems. Understanding its capabilities for still image capture can unlock creative projects, from time-lapse photography to automated surveillance systems.
This Python-based library leverages the Raspberry Pi’s camera module, providing a flexible interface for capturing images with customizable settings. Whether you’re a hobbyist building a smart home device or a developer creating advanced imaging applications, Picamera2 simplifies the process. Its ability to handle still images with precision makes it a go-to choice for many Raspberry Pi projects.
In this article, we’ll explore Picamera2’s still image capture functionality, diving into its setup, configuration, and practical applications. From basic image capture to advanced techniques like adjusting resolution and exposure, we’ll cover everything you need to know. Let’s dive into how Picamera2 can help you capture stunning still images effortlessly.
Setting Up Picamera2 for Still Image Capture
Installing Picamera2
To start capturing still images, you first need to install Picamera2 on your Raspberry Pi. Ensure your system runs a compatible OS, like Raspberry Pi OS Bullseye or later. Open a terminal and install the library using pip with the command pip install picamera2. Verify your camera module is connected properly. This setup ensures smooth integration for image capture tasks.
Connecting the Camera Module
The Raspberry Pi camera module must be securely connected to the CSI port. Power off your Pi, attach the camera ribbon cable, and enable the camera interface via raspi-config. Test the connection with a simple Picamera2 script to confirm functionality. A properly connected camera is crucial for reliable still image capture.
Verifying System Compatibility
Picamera2 requires a 64-bit Raspberry Pi OS for optimal performance. Check your OS version using uname -a in the terminal. Ensure your camera firmware is updated to avoid compatibility issues. This step guarantees that Picamera2 can access the camera hardware effectively for capturing still images.
Basic Still Image Capture with Picamera2
Writing a Simple Capture Script
Creating a basic script to capture still images is straightforward with Picamera2. Import the library, initialize the camera, and use the capture_file method to save an image. A simple script can be written in a few lines of Python. This ease of use makes Picamera2 ideal for beginners.
Supported Image Formats
Picamera2 supports popular image formats for still capture, including:
- JPEG: Ideal for compressed, high-quality images.
- PNG: Suitable for lossless images with transparency.
- BMP: Useful for uncompressed, simple images.
- YUV: Efficient for raw image data processing. These formats provide flexibility for various project requirements.
Saving Images to a File
To save a captured image, specify the file path in the capture_file method, such as camera.capture_file(“image.jpg”). Ensure sufficient storage space on your Raspberry Pi’s SD card. You can customize the file name and location dynamically. This feature simplifies organizing captured images for later use.
Configuring Image Settings for Optimal Results
Adjusting Resolution
Picamera2 allows you to set custom resolutions for still images, up to the camera module’s maximum capability. Use the sensor_resolution property to check available resolutions. Higher resolutions yield detailed images but require more storage. Adjust settings based on your project’s needs for clarity and efficiency.
Controlling Exposure and Brightness
Fine-tune exposure and brightness to enhance image quality. Picamera2’s set_controls method lets you adjust exposure time and analog gain. Experiment with these settings to capture clear images in varying lighting conditions. This control is essential for professional-quality stills.
Setting White Balance
Achieve accurate colors by configuring white balance. Picamera2 supports automatic and manual white balance modes. Use set_controls to specify red and blue gains for custom settings. Proper white balance ensures your still images reflect true-to-life colors, especially in mixed lighting environments.
Advanced Techniques for Still Image Capture
Capturing High-Resolution Images
For projects requiring ultra-clear images, Picamera2 supports high-resolution capture with modern camera modules like the HQ Camera. Configure the sensor_mode to maximize resolution. Be mindful of increased processing time and storage needs. This feature is perfect for detailed photography projects.
Using Burst Mode
Picamera2 enables burst mode for rapid image capture. Implement a loop in your script to take multiple images in quick succession. This is ideal for time-lapse or motion detection projects. Adjust the capture interval to balance speed and storage requirements.
Applying Image Effects
Enhance still images with Picamera2’s built-in effects, like negative, solarize, or black-and-white. Use the set_controls method to apply these effects before capturing. Experimenting with effects can add creative flair to your images, making them stand out for artistic projects.
Troubleshooting Common Picamera2 Issues
Resolving Camera Detection Problems
If Picamera2 fails to detect the camera, check the ribbon cable connection and ensure the camera is enabled in raspi-config. Run vcgencmd get_camera to verify detection. Update your system and Picamera2 library to fix potential bugs. This ensures reliable image capture.
Handling File Save Errors
File save errors may occur due to insufficient storage or incorrect file paths. Verify your SD card has enough space and check write permissions for the target directory. Use absolute file paths in your script to avoid errors. These steps ensure smooth image saving.
Fixing Image Quality Issues
Blurry or dark images often result from incorrect settings. Adjust exposure, focus, and white balance using Picamera2’s controls. Test captures in different lighting conditions to find optimal settings. Regular calibration improves the quality of your still images significantly.
Practical Applications of Picamera2 Still Image Capture
Building a Time-Lapse Camera
Picamera2 is perfect for creating time-lapse sequences. Write a script to capture images at set intervals, then compile them into a video. This is great for documenting projects like plant growth or construction progress. Automate the process for consistent results.
Creating a Security Camera
Use Picamera2 to build a motion-activated security camera. Combine still image capture with motion detection libraries like OpenCV. Save images when motion is detected for later review. This application enhances home or office security with minimal hardware.
Developing Photography Projects
Picamera2 supports creative photography projects, such as automated wildlife cameras or artistic installations. Customize settings for unique lighting or effects to capture stunning images. Its flexibility makes it a favorite for hobbyists and professionals alike.
Conclusion
Picamera2 is a versatile tool for capturing high-quality still images with Raspberry Pi camera modules. Its user-friendly interface, customizable settings, and support for various image formats make it ideal for beginners and advanced users alike. From basic snapshots to advanced time-lapse and security applications, Picamera2 empowers creative and practical projects. By mastering its features, you can unlock endless possibilities for photography and automation, elevating your Raspberry Pi experience.