The Raspberry Pi ecosystem offers powerful tools for DIY projects, and Picamera2 is a standout for capturing high-quality video. Many enthusiasts wonder if Picamera2, the Python library for Raspberry Pi cameras, can record audio alongside video. This question is pivotal for projects like home security systems, live streaming, or vlogging setups. Understanding Picamera2’s capabilities helps users determine if it meets their multimedia needs or requires additional solutions.
Picamera2, built for Raspberry Pi’s camera modules, excels in video capture and advanced image processing. Its flexibility makes it popular among hobbyists and developers. However, audio recording isn’t natively supported, which can be a hurdle for projects needing synchronized sound. Exploring workarounds and external tools is key to achieving audio-video integration. This article dives into Picamera2’s limitations, solutions, and practical steps for recording audio with video.
Whether you’re building a smart doorbell or a wildlife camera, knowing how to pair audio with video enhances functionality. While Picamera2 focuses on video, combining it with other software or hardware can bridge the audio gap. From external microphones to post-processing techniques, there are ways to create seamless multimedia outputs. Let’s explore Picamera2’s audio capabilities, workarounds, and setup tips to help you craft professional-grade projects with ease.
Understanding Picamera2’s Core Functionality
What Is Picamera2?
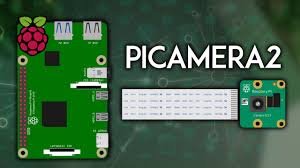
Picamera2 is a Python library designed for Raspberry Pi camera modules, offering robust video and image capture. It supports high-resolution recording, real-time processing, and customizable settings. Built on libcamera, it’s optimized for modern Raspberry Pi systems. While powerful for visuals, it lacks built-in audio recording. Developers rely on its flexibility to integrate with other tools for complete multimedia solutions.
Video Recording Capabilities
Picamera2 excels in capturing video in various formats, like H.264 and MJPEG. It supports resolutions up to 4K, depending on the camera module, and allows frame rate adjustments. Features like exposure control and overlays enhance creative projects. However, its focus remains on video and image data. Audio integration requires external hardware or software to complement Picamera2’s strengths.
Limitations of Native Audio Support
Picamera2 does not natively record audio due to its libcamera foundation, which prioritizes camera control. This limitation stems from its design for image and video processing, not audio streams. Users needing sound must pair it with separate audio capture tools. Understanding this constraint helps plan effective workarounds. Combining Picamera2 with audio solutions ensures versatile project outcomes.
Why Picamera2 Lacks Built-In Audio Recording
Focus on Camera Control
Picamera2’s architecture centers on camera hardware, emphasizing video and image quality. Its libcamera framework handles complex imaging tasks but excludes audio pipelines. This design choice keeps the library lightweight and specialized. Developers benefit from its streamlined performance but need external tools for audio. This focus allows Picamera2 to excel in visual applications.
Hardware Constraints
Raspberry Pi camera modules, like the HQ Camera, are designed for video and stills, not audio input. They lack built-in microphones or audio circuitry. To record sound, users must connect external USB microphones or audio hats. This hardware limitation shapes Picamera2’s capabilities. Pairing with compatible audio devices is essential for multimedia projects.
Software Ecosystem Gaps
The libcamera framework underpinning Picamera2 doesn’t integrate audio streams, unlike some multimedia libraries. While Picamera2 handles video encoding efficiently, it doesn’t interface with audio drivers. Users must leverage separate software for audio capture, like PyAudio or FFmpeg. These gaps require creative solutions to sync audio and video. Bridging them unlocks Picamera2’s full potential for dynamic projects.
Workarounds for Recording Audio with Picamera2
Using External Microphones
An external USB microphone or audio hat can capture sound alongside Picamera2’s video. Devices like USB sound cards are affordable and compatible with Raspberry Pi. Software like Audacity or PyAudio records audio streams. Syncing these with video requires precise timing in post-processing. This approach suits projects needing high-quality audio input.
Leveraging FFmpeg for Audio-Video Integration
FFmpeg, a powerful multimedia framework, can combine Picamera2’s video with separately recorded audio. Key steps include:
- Recording video with Picamera2 in H.264 format.
- Capturing audio via a USB microphone using FFmpeg.
- Merging streams with FFmpeg’s muxing capabilities.
- Ensuring timecode alignment for seamless playback.
- Saving the output in formats like MP4. This method ensures professional-grade audio-video synchronization for versatile applications.
Python Scripts for Synchronization
Custom Python scripts can coordinate Picamera2 video with audio from tools like PyAudio. By timestamping both streams, scripts align audio and video during processing. Libraries like MoviePy simplify merging in post-production. This approach demands coding expertise but offers flexibility. It’s ideal for developers building tailored multimedia solutions.
Setting Up Audio Recording with Picamera2
Choosing the Right Hardware
Selecting a compatible microphone is critical for audio capture. USB microphones, like the Blue Snowball, or Raspberry Pi audio hats work well. Ensure the device supports Linux drivers for seamless integration. Check power requirements to avoid Raspberry Pi overload. Proper hardware selection enhances audio quality for your project.
Installing Necessary Software
To enable audio, install tools like FFmpeg, PyAudio, or Audacity on your Raspberry Pi. Update your system with sudo apt update and install dependencies. For FFmpeg, use sudo apt install ffmpeg. Configure audio drivers to recognize your microphone. These steps ensure your software stack supports audio-video workflows.
Configuring Audio-Video Sync
Syncing requires precise timestamp alignment. Use FFmpeg’s -itsoffset flag to adjust audio timing against video. Test recordings to verify synchronization accuracy. Tools like MoviePy can automate this in Python scripts. Fine-tuning ensures smooth playback, critical for professional outputs. Regular testing prevents desync issues in final files.
Practical Applications Requiring Audio and Video
Home Security Systems
Audio enhances security camera footage for monitoring. Picamera2 captures clear video, while a microphone records ambient sounds. Combining these with FFmpeg creates comprehensive surveillance files. Benefits include:
- Detecting audio cues like breaking glass.
- Improving event documentation.
- Enhancing playback clarity.
- Supporting real-time alerts.
- Enabling remote monitoring. This setup is ideal for DIY home security projects.
Wildlife Monitoring Projects
Wildlife cameras benefit from audio to capture animal sounds alongside visuals. Picamera2 records high-quality video of habitats, while a microphone adds environmental audio. Post-processing with FFmpeg merges streams effectively. This creates immersive footage for research or education. Audio-video integration enriches data collection for conservation efforts.
Live Streaming Setups
For streaming, audio-video sync is crucial. Picamera2 handles video, while tools like PyAudio capture commentary or ambient sound. FFmpeg streams the combined output to platforms like YouTube. This setup supports real-time broadcasting for events or tutorials. It’s perfect for creators needing reliable, low-cost streaming solutions.
Best Practices for Audio-Video Integration
Optimizing Audio Quality
Use high-quality microphones and minimize background noise for clear recordings. Position the microphone close to the sound source. Adjust input levels in software like Audacity to avoid distortion. Test recordings to ensure clarity. High-quality audio enhances the professionalism of your video output.
Ensuring Reliable Synchronization
Synchronization is critical for seamless playback. Use software with precise timestamping, like FFmpeg or MoviePy. Test sync at different project stages to catch delays. Adjust offsets as needed during post-processing. Consistent testing ensures audio aligns perfectly with Picamera2’s video.
Testing and Troubleshooting
Regularly test your setup to identify issues early. Check for audio drift, hardware compatibility, or software crashes. Use short test recordings to verify sync and quality. Debug with tools like FFmpeg’s logging features. Thorough testing ensures reliable multimedia outputs for any project.
Conclusion
Picamera2 is a powerful tool for video capture on Raspberry Pi, but it lacks native audio recording. By using external microphones, FFmpeg, or Python scripts, users can effectively integrate audio with video. These workarounds enable diverse applications, from security systems to wildlife monitoring. With the right hardware and software, Picamera2 becomes a versatile solution for multimedia projects. Exploring these methods empowers creators to build professional, audio-enhanced videos effortlessly, unlocking endless creative possibilities.