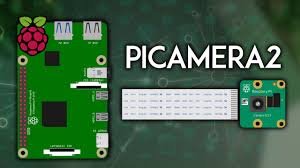
The Raspberry Pi 5, with its enhanced processing power and upgraded features, has sparked excitement among hobbyists, developers, and educators. As projects evolve, many users are eager to integrate camera modules, with Picamera2 being a popular choice for its Python-based interface and versatility. A common question arises: is Picamera2 compatible with Raspberry Pi 5, and how does it perform on this new hardware?
Picamera2, the modern Python library for Raspberry Pi camera modules, offers a robust framework for capturing images and videos. Its compatibility with the latest Raspberry Pi models, including the Pi 5, is critical for developers building applications like surveillance systems, time-lapse photography, or machine vision projects. Understanding how Picamera2 integrates with the Raspberry Pi 5 ensures users can leverage its full potential for their creative endeavors.
This article explores Picamera2’s compatibility with the Raspberry Pi 5, diving into setup processes, performance considerations, and potential challenges. By examining system requirements, installation steps, and optimization tips, you’ll gain clarity on how to use Picamera2 effectively. Whether you’re a beginner or an experienced developer, this guide provides actionable insights to enhance your Raspberry Pi 5 camera projects.
Understanding Picamera2 and Raspberry Pi 5
What is Picamera2?
Picamera2 is a Python library designed to control Raspberry Pi camera modules. It replaces the older Picamera library, offering improved functionality and support for modern camera hardware. Built on libcamera, it provides a flexible interface for capturing images, videos, and advanced processing. Its open-source nature makes it ideal for custom projects. Developers appreciate its ease of use and extensive documentation.
Key Features of Raspberry Pi 5
The Raspberry Pi 5 boasts a quad-core 64-bit Arm Cortex-A76 processor, delivering a significant performance boost over its predecessors. It supports up to 8GB of RAM, enhanced GPU capabilities, and improved connectivity with USB 3.0 and dual-band Wi-Fi. The upgraded hardware enables faster processing for camera-based applications. Its camera connector supports a range of modules. This makes it a powerful platform for Picamera2 projects.
Why Compatibility Matters
Compatibility ensures seamless integration between Picamera2 and Raspberry Pi 5 hardware. Mismatched software or hardware can lead to errors, reduced performance, or limited functionality. Verifying compatibility helps developers avoid frustrating troubleshooting. It also ensures access to Picamera2’s full feature set, like real-time image processing. Understanding compatibility saves time and enhances project success.
Is Picamera2 Compatible with Raspberry Pi 5?
Official Compatibility Status
Picamera2 is fully compatible with Raspberry Pi 5, as confirmed by the Raspberry Pi Foundation. It leverages the libcamera framework, which is optimized for the Pi 5’s architecture. Users can connect official Raspberry Pi camera modules, such as Camera Module 3, without issues. The library supports the Pi 5’s upgraded processing capabilities. This ensures smooth operation for camera-based applications.
Supported Camera Modules
Picamera2 works with a variety of camera modules on the Raspberry Pi 5, including:
- Raspberry Pi Camera Module 3 (standard and wide-angle variants)
- Raspberry Pi High Quality Camera with interchangeable lenses
- Third-party libcamera-compatible modules
- Legacy Camera Module 2 (with compatibility tweaks) These modules enable diverse applications, from high-resolution photography to low-light imaging, enhancing project flexibility.
Operating System Requirements
To use Picamera2 on Raspberry Pi 5, you need Raspberry Pi OS based on Debian Bookworm or later. Older OS versions, like Bullseye, may not fully support libcamera. A 64-bit OS is recommended for optimal performance. Ensure the system is updated to avoid compatibility issues. This setup maximizes Picamera2’s capabilities on the Pi 5.
Setting Up Picamera2 on Raspberry Pi 5
Installing Raspberry Pi OS
Start by installing the latest Raspberry Pi OS (Bookworm) on your Pi 5. Use the Raspberry Pi Imager to flash the OS onto a microSD card. Select the 64-bit version for better performance. Update the system using sudo apt update and sudo apt upgrade. This ensures compatibility with Picamera2 and libcamera.
Installing Picamera2
Picamera2 installation is straightforward on Raspberry Pi 5. Open a terminal and run sudo apt install python3-picamera2 to install the library. Ensure libcamera is installed, as it’s a dependency. Verify the installation by running a simple Python script to capture an image. This confirms Picamera2 is ready for use.
Connecting the Camera Module
Physically connect the camera module to the Pi 5’s camera port using the ribbon cable. Ensure the cable is securely attached and oriented correctly. Enable the camera interface via raspi-config under the “Interfaces” menu. Reboot the Pi 5 to apply changes. Test the setup by capturing a sample image.
Optimizing Picamera2 Performance
Tuning Camera Settings
Picamera2 offers extensive controls for adjusting resolution, frame rate, and exposure. Optimize settings based on your project, such as lowering resolution for faster processing. Use the library’s preview mode to fine-tune parameters in real time. Experiment with white balance and ISO for better image quality. These tweaks enhance performance on the Pi 5.
- Adjust resolution for specific use cases
- Set frame rates for smooth video
- Fine-tune exposure for lighting conditions
- Use preview mode for real-time adjustments
- Test settings to balance quality and speed
Leveraging Pi 5’s Hardware
The Raspberry Pi 5’s enhanced CPU and GPU accelerate Picamera2’s image processing. Use the 64-bit OS to fully utilize the hardware’s capabilities. Enable GPU acceleration for tasks like video encoding. Allocate sufficient memory to the GPU via raspi-config. This ensures smooth performance for demanding applications.
Handling Large Data Outputs
High-resolution images and videos generate large data volumes. Use fast microSD cards (Class 10 or higher) to handle data efficiently. Implement compression techniques in Picamera2 to reduce file sizes. Streamline code to minimize memory usage. These steps prevent performance bottlenecks during data-intensive tasks.
Common Challenges and Solutions
Troubleshooting Installation Issues
Installation errors may occur due to outdated OS versions or missing dependencies. Ensure Raspberry Pi OS is updated to Bookworm or later. Reinstall libcamera and Picamera2 if issues persist. Check for error logs in the terminal for specific clues. Online forums like the Raspberry Pi community can offer solutions.
- Update OS to the latest version
- Reinstall dependencies like libcamera
- Check terminal logs for errors
- Consult community forums for advice
- Test with a minimal Python script
Addressing Performance Lag
Performance lag can stem from high-resolution settings or insufficient memory. Lower the resolution or frame rate to reduce processing demands. Increase GPU memory allocation in raspi-config. Close unnecessary background processes to free up resources. These adjustments improve Picamera2’s responsiveness on the Pi 5.
Resolving Hardware Conflicts
Camera module conflicts may arise from loose connections or incompatible hardware. Double-check the ribbon cable’s orientation and connection. Verify the camera module is libcamera-compatible. Update firmware using sudo rpi-update if issues persist. Testing with an alternative module can isolate the problem.
Advanced Picamera2 Applications
Real-Time Image Processing
Picamera2 supports real-time image processing, ideal for applications like object detection. Use OpenCV alongside Picamera2 to analyze frames on the Pi 5. The enhanced processor handles complex algorithms efficiently. Experiment with pre-trained models for tasks like facial recognition. This unlocks creative possibilities for advanced projects.
Video Streaming and Recording
Picamera2 enables high-quality video recording and streaming. Configure settings for 1080p or 4K output, depending on the camera module. Use RTSP or WebRTC for live streaming over networks. Optimize encoding settings to balance quality and bandwidth. The Pi 5’s hardware ensures smooth video performance.
Integrating with IoT Projects
Picamera2 is perfect for IoT applications, such as smart home surveillance. Combine it with MQTT or cloud platforms for remote access. Use the Pi 5’s Wi-Fi for wireless data transmission. Implement motion detection to trigger alerts. These features create robust, connected camera systems.
Conclusion
Picamera2 is fully compatible with the Raspberry Pi 5, offering a powerful toolset for camera-based projects. From easy installation to advanced applications like real-time processing and IoT integration, it unlocks endless possibilities. By optimizing settings and addressing challenges, users can achieve seamless performance. Whether you’re capturing stunning visuals or building smart systems, Picamera2 and Raspberry Pi 5 deliver reliable results. Dive into your next project with confidence, leveraging this dynamic duo for success.