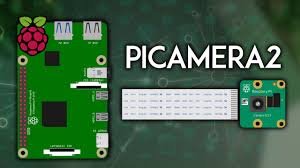
The Raspberry Pi ecosystem thrives on its versatility, enabling enthusiasts, developers, and educators to create innovative projects with minimal hardware. At the heart of many such projects lies the camera module, a compact yet powerful tool for capturing images and videos. Picamera2, the modern Python library for interfacing with Raspberry Pi cameras, has gained attention for its enhanced capabilities over its predecessor, offering improved control and flexibility for camera-based applications.
Understanding whether Picamera2 supports video recording is crucial for anyone building surveillance systems, time-lapse projects, or multimedia applications. This library, designed for Raspberry Pi’s camera modules, provides a robust interface to harness the full potential of the hardware. Unlike the original Picamera library, Picamera2 leverages the libcamera framework, delivering better performance and compatibility with newer Raspberry Pi models and camera modules, including the High-Quality Camera and Camera Module 3.
This article explores Picamera2’s video recording capabilities in depth, addressing its features, setup requirements, performance considerations, and practical applications. Whether you’re a hobbyist setting up a home security camera or a developer integrating video into a larger project, understanding Picamera2’s functionality ensures you can make informed decisions. Let’s dive into the specifics of video recording with Picamera2, covering everything from basic setup to advanced configurations.
Overview of Picamera2 and Its Core Features
What Is Picamera2?
Picamera2 is a Python library built to interface with Raspberry Pi camera modules, succeeding the original Picamera library. It utilizes the libcamera stack, which offers a modern, open-source framework for camera control. This shift enables better compatibility with newer Raspberry Pi hardware and supports advanced features like real-time image processing. Picamera2 simplifies camera operations while providing developers with greater flexibility. It’s ideal for projects requiring precise control over camera settings.
Key Improvements Over Picamera
Compared to the original Picamera, Picamera2 offers significant upgrades in performance and functionality. It supports newer camera modules, such as the Camera Module 3, and integrates seamlessly with Raspberry Pi OS Bullseye and later. The library provides enhanced image and video processing capabilities, including support for raw sensor data. Its modular design allows developers to customize pipelines for specific use cases. These improvements make Picamera2 a powerful tool for modern applications.
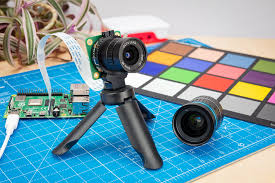
Supported Camera Modules
Picamera2 is compatible with a range of Raspberry Pi camera modules, including the Camera Module v1, v2, v3, and the High-Quality Camera. Each module offers distinct resolutions and features, such as improved low-light performance in the Camera Module 3. The library automatically detects connected hardware, simplifying setup. Users can leverage these modules for various tasks, from basic photography to complex video recording projects. Compatibility ensures flexibility across different Raspberry Pi setups.
Does Picamera2 Support Video Recording?
Video Recording Capabilities
Picamera2 fully supports video recording, allowing users to capture high-quality footage with Raspberry Pi camera modules. It can record videos in formats like H.264, offering resolutions up to 1080p or higher, depending on the camera module. The library provides fine-grained control over parameters like frame rate, bitrate, and resolution. This makes it suitable for applications ranging from security monitoring to live streaming. Video recording is both reliable and efficient with proper configuration.
Supported Video Formats
Picamera2 supports several video encoding formats, primarily H.264, which balances quality and file size effectively. Key features include:
- H.264 encoding: Widely compatible, efficient compression for high-quality videos.
- Customizable frame rates: Adjust from 15 to 60 FPS based on project needs.
- Resolution flexibility: Supports 720p, 1080p, and higher with compatible modules.
- Container formats: Outputs to MP4 or other formats with additional processing.
- Real-time encoding: Ensures smooth recording without significant lag.
These options make Picamera2 versatile for various video recording scenarios.
Limitations of Video Recording
While Picamera2 excels in video recording, it has some limitations. High-resolution recordings at high frame rates can strain the Raspberry Pi’s CPU, especially on older models like the Pi 3. Storage requirements for extended recordings can also be significant. Users may need to optimize settings to avoid overheating or dropped frames. Proper cooling and high-speed SD cards are recommended for intensive video tasks. Understanding these constraints helps in planning effective projects.
Setting Up Picamera2 for Video Recording
Installing Picamera2
To begin video recording with Picamera2, you need to install the library on a Raspberry Pi running OS Bullseye or later. Start by updating the system with sudo apt update and sudo apt upgrade. Then, install Picamera2 using pip install picamera2. Ensure the camera module is connected and enabled via raspi-config. The installation process is straightforward, typically completing in minutes. Verify the setup by running a simple test script.
Configuring the Camera Module
Proper configuration is essential for video recording. Connect the camera module to the Raspberry Pi’s CSI port, ensuring secure connections. Use the libcamera-hello command to test camera detection. In Picamera2, initialize the camera with a Python script, specifying video mode and resolution. For example, camera.start_recording(“output.mp4″, format=”h264”) begins recording. Adjust settings like resolution and frame rate based on your project requirements.
Writing a Basic Video Recording Script
Creating a video recording script with Picamera2 is simple. Import the library, initialize the camera, and configure video settings. A basic script might include setting 1080p resolution at 30 FPS, starting the recording, and stopping after a defined duration. Save the output as an MP4 file for compatibility. Test the script to ensure the camera records correctly. This approach allows beginners to quickly start capturing videos.
Optimizing Video Recording Performance
Choosing the Right Resolution and Frame Rate
Selecting appropriate resolution and frame rate is critical for smooth video recording. Higher resolutions like 1080p or 4K provide better quality but demand more processing power. Frame rates of 24–30 FPS are ideal for most applications, while 60 FPS suits fast-moving scenes. Test different combinations to balance quality and performance. For example, 720p at 30 FPS is often sufficient for low-resource devices. Always consider the Raspberry Pi model’s capabilities.
Managing Storage and Bandwidth
Video recordings, especially in high resolution, consume significant storage. Key considerations include:
- High-speed SD cards: Use Class 10 or UHS-I cards for faster write speeds.
- Compression settings: Adjust H.264 bitrate to reduce file sizes without sacrificing quality.
- External storage: Connect USB drives for longer recordings.
- Network streaming: Optimize bandwidth for live video feeds.
- File management: Split long recordings into smaller segments for easier handling.
These strategies ensure efficient storage and smooth performance.
Cooling and Hardware Considerations
Intensive video recording can overheat the Raspberry Pi, particularly during extended sessions. Use heatsinks or cooling fans to maintain optimal temperatures. Ensure adequate power supply to avoid voltage drops. For high-performance tasks, consider models like the Raspberry Pi 4 or 5 with higher processing capabilities. Monitoring system resources during recording helps prevent crashes. Proper hardware setup enhances reliability for long-term projects.
Practical Applications of Picamera2 Video Recording
Home Security Systems
Picamera2 is ideal for building DIY home security cameras. It supports motion detection and real-time video recording, enabling users to monitor their homes remotely. Configure the camera to record when motion is detected, saving footage to a local or cloud storage. Integration with tools like MQTT or Home Assistant enhances functionality. High-quality video ensures clear footage for identifying details. This makes Picamera2 a cost-effective solution for security.
Time-Lapse Photography
Time-lapse videos are a popular use case for Picamera2. By capturing frames at set intervals and compiling them into a video, users can create stunning visuals of events like sunsets or plant growth. Key features include:
- Customizable intervals: Set frame capture frequency for desired effect.
- High-resolution support: Ensures sharp, detailed time-lapse videos.
- Automated scripts: Schedule recordings for long-term projects.
- Post-processing integration: Combine with tools like FFmpeg for editing.
- Low resource usage: Efficient for extended recording periods.
These capabilities make time-lapse projects accessible and professional.
Live Streaming Applications
Picamera2 supports live streaming, enabling real-time video feeds for platforms like YouTube or Twitch. Configure the library to encode video in H.264 and stream via RTSP or WebRTC. This is useful for applications like remote monitoring or live broadcasts. Ensure a stable network connection and sufficient bandwidth for smooth streaming. Picamera2’s flexibility allows customization of stream quality and latency. It’s a powerful tool for interactive projects.
Troubleshooting Common Video Recording Issues
H3: Resolving Camera Detection Problems
If Picamera2 fails to detect the camera, verify the physical connection to the CSI port. Run libcamera-hello to test the camera module. Ensure the camera is enabled in raspi-config under Interfacing Options. Update the Raspberry Pi OS and Picamera2 to the latest versions. Check for error messages in your script to diagnose issues. These steps usually resolve detection problems quickly.
Fixing Frame Drops and Lag
Frame drops during video recording often result from insufficient processing power or storage bottlenecks. Lower the resolution or frame rate to reduce CPU load. Use a high-speed SD card to prevent write delays. Monitor system resources with tools like htop to identify bottlenecks. Adding cooling solutions can also help maintain performance. Optimizing settings ensures smooth, uninterrupted video capture.
Handling File Corruption
Corrupted video files can occur if recordings are interrupted or storage fails. Always stop recordings properly using camera.stop_recording() in your script. Use reliable storage media and avoid removing the SD card during recording. Splitting long recordings into smaller files reduces the risk of corruption. Regularly back up footage to external drives or cloud storage. These practices ensure your videos remain intact and accessible.
Conclusion
Picamera2 offers robust video recording capabilities, making it an excellent choice for Raspberry Pi projects. Its support for high-quality video, flexible configurations, and compatibility with modern camera modules empower users to create diverse applications, from security systems to time-lapse videos. By understanding its features, optimizing performance, and troubleshooting issues, you can unlock its full potential. Whether you’re a beginner or an experienced developer, Picamera2 provides the tools to bring your vision to life, enhancing your Raspberry Pi experience.